How to Define a Namespace for Packages in Salesforce DX
 נכתב על ידי ליאור לביא, עודכן בתאריך 02/11/2023
Important Note Before Getting Started...
Attention! This guide deals with registering a namespace, creating environments for namespace registration, and defining Dev Hub. Some of these actions are irreversible, have business implications, and are visible to your customers! Use caution when registering namespaces, and remember that it is a step that may limit your future use of the same namespace in non-practice environments. This is especially true for namespaces containing a business or company name. In case of doubt or uncertainty, it is recommended to consult Salesforce's official documentation, and in any case, I assume no responsibility for any damage that may result from following the steps outlined in this guide.
Now, let's learn a bit about namespace in Salesforce.
What Is a Namespace and When Do We Want to Use It?
A namespace is an identifier up to 15 characters long that is added as a prefix to the names of components included in a package.
For more information about packages and versions, you are welcome to read the post "How to Create Packages and Versions in Salesforce DX" here on the blog.
Advantages of Using Namespace
- Creating a distinction between our components and components from other packages on the AppExchange. Imagine the following situation: on our environment, we have installed two packages, one we created, and its namespace is MyCompany, and the other is downloaded from the Salesforce AppExchange app store, and its namespace is Acme.
Both packages create a field named Color on the Account object. The field label may be the same, Color, but the API Name will be different. The field we created will be called MyCompany__Color__c while the field created by the app we downloaded will be named Acme__Color__c.
The field name structure will be namespace__fieldName__c. - Exposing our code to other packages we create without making it global. For example, let's say we have two packages, Package A and Package B, both using the same Namespace. Under Package A, there is a class named MyClass, and it has a method named myMethod.
If we want to create an instance of the MyClass class or execute the myMethod method from within package B, we can make the MyClass class global by changing its access modifier from public to global, like this:public class MyClass{ public void myMethod(){ //My cool code goes here... } }
The problem with this approach is that it exposes the MyClass class and the myMethod method to anyone with access to the code, including our customers and competitors. A better way to control the exposure of our components is by using annotations, like @namespaceAccessible, attached to the class and method declarations, as follows:global class MyClass{ global void myMethod(){ //My cool code goes here... } }
This annotation will expose the MyClass class and the myMethod method only to packages sharing the same Namespace, allowing us to maintain exclusive access to our code. This concept applies not only to classes and methods but also to variables, interfaces, and abstract classes.@namespaceAccessible public class MyClass{ @namespaceAccessible public void myMethod(){ //My cool code goes here... } }
Considerations Before Using Namespace
- A namespace is unique across all orgs in Salesforce. Once we create a namespace for ourselves, no one else can use it, only us. The reason for this is that the namespace is meant to make all of our components unique and prevent conflicts with components from other developers or companies. Pay attention to this. We do not want to perform tests on Trailhead and register a namespace with our workplace's name, only to discover that it is now associated with our Developer Edition on Trailhead and the Dev Hub we created there. In this context, it is essential to be aware of Salesforce's comments on this topic:
Salesforce DX Developer Guide: Best Practices for Unlocked Packages. The emphasis was added by me.
Choose namespaces carefully. If you’re trying out this feature or need a namespace for testing purposes, choose a disposable namespace. Don’t choose a namespace that you want to use in the future for a production org or some other real use case. Once you associate a namespace with an org, you can't change it or reuse it.Source: Salesforce DX Developer Guide: Link a Namespace to a Dev Hub Org. The emphasis was added by me.
- A Namespace is defined for a package at the time of its creation and cannot be changed afterward.
- Multiple packages can be associated with one namespace, but one package cannot be associated with more than one namespace.
- If you plan to work with more than one namespace, Salesforce recommends creating a separate SFDX project for each namespace.
How to Create a New Namespace
To create a new namespace, we will need two Salesforce environments: one Developer Edition for registering the namespace and one Dev Hub to link our new namespace to.
However, since at this stage, we are only practicing the creation and use of a namespace, instead, we will create two Trailhead environments and use them as our Dev Hubs for registering the namespace.
The steps we will perform are:
- Create Trailhead environments for registering the namespace and set up Dev Hub.
- Setting up our new namespace in one of the Trailhead environments we created.
- Setting up our second Trailhead environment as a Dev Hub and linking it to our namespace.
- Creating an SFDX project with a simple Lightning Web Component.
- Associating our project with our Trailhead Dev Hub.
- Creating a new package with a namespace.
- Creating an initial version for our package.
- Creating a scratch org and installing our version for testing.
Creating Trailhead Environments for Namespace Registration and Dev Hub Setup
To create a Trailhead playground environment, follow these steps:
- Log in to Trailhead. If you don't have a Trailhead account, click here for a guide on opening a Trailhead account and setting up your first playground environment.
- Click on your name in the top-right corner of the screen, next to your profile picture, and select Hands-On Orgs from the menu.
- Click the Create Playground button.
- Give a name to the new environment, for example, Namespace DevHub, and click Create.
- Wait for Salesforce to finish creating the environment. This may take a few minutes.

- Once the environment is created, click the Launch button next to the environment name to open it.
- After the environment is opened, click the Get Your Login Credentials tab.
- In the Get Your Login Credentials tab, copy your username and save it on the side; we will need it later.
- Click the Reset My Password button. In the pop-up window, click OK.
- Open the email associated with your Trailhead account and open the email with the subject Finish resetting your Developer Edition password.
- Click the link in the email to reset your password.
- In the browser tab that opens, click Reset Password.
- In the Change Your Password screen, choose a new password and click the Change Password button.
- Repeat steps 13-1 to create a second Trailhead environment. However, this time, in step 4, choose a different name for the environment, for example, Namespace Register.
Setting Up Our New Namespace in Our New Trailhead Environment
To register our new namespace, follow these steps:
- Click the Launch button next to the environment named Namespace Register in our list of environments on the Hand-On Orgs page in Trailhead.
- Click the gear icon next to the bell icon and your profile picture and select Setup.
- In the Quick Find field on the left, enter the word Package and select the result Package Manager. On the page that opens, next to the subheading Namespace Settings, click the Edit button.
If you don't see the Edit button, make sure you are in a Developer Edition environment and that it is not set up as a Dev Hub.
To check if the environment we are in is a Developer Edition, follow these steps:- Go to Setup.
- In the Quick Find field on the left, enter the word Company and select the option Company Information.
- On the page that opens, look for the field Organization Edition. Make sure the value in it is Developer Edition. This is the default value for Trailhead playgrounds.
- Go to Setup.
- In the Quick Find field on the left, enter the word DevHub and select the option DevHub from the results.
- On the page that opens, make sure that the option Enable Dev Hub is Disabled.
- Back to the Package Manager in step 3, after clicking the Edit button, enter your test namespace name and click the Check Availability button. Remember! We don't want to register a namespace in a Trailhead playground that we want to use in the future with customers because it will be associated with our Trailhead environment and not with a dedicated business environment. For this example, I used "tns1," which stands for Test Namespace 1.
- Leave the Package name field as None and click the Review button.
- In the Review screen, you can see that Salesforce is warning us once again that once we save our namespace, the action is irreversible.
After you save your namespace, or associate a namespace with a package, you can't make changes.
- Click on Save.
Now, in the Package Manager screen, you will see our Namespace in green next to the text Namespace Prefix.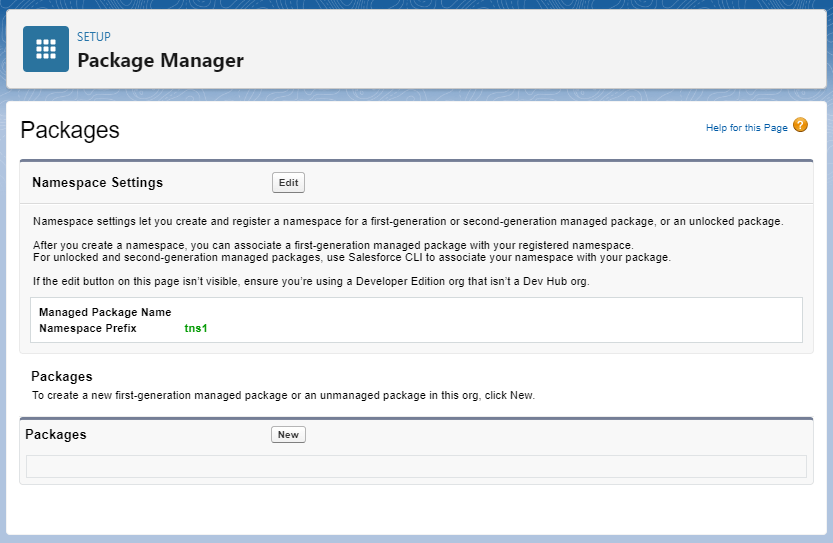
- Excellent! We have created a new namespace! Now, we'll set up our second Trailhead environment as a Dev Hub and link it to our namespace.
Setting Up Our Second Trailhead Environment as a Dev Hub and Linking It to Our Namespace
To set up our second Trailhead environment, Namespace DevHub, as a Dev Hub and link it to our namespace, follow these steps:
- Log in to the Namespace DevHub environment that we created through the Hands-On Orgs page on Trailhead by clicking the Launch button.
- Go to Setup.
- In the Quick Find field, type Dev Hub and click the result Dev Hub under Development.
- In the Dev Hub page, activate the options Enable Dev Hub and Enable Unlocked Packages and Second-Generation Managed Packages. Note that these actions are irreversible!
- Great! We've configured our environment as a Dev Hub. The next step is to link it to our namespace. Please be aware that to perform the following steps in environments other than Trailhead, you will need to ensure that the user you're logged in with is either a System Administrator or has Salesforce DX Namespace Registry permissions. It's also recommended to enable pop-ups for our Dev Hub environment in your browser.
- Click on the App Launcher button.
- In the Search apps and items field, type Namespace and select the result Namespace Registries.
- In the Namespace Registries page, click the Link Namespace button at the top right.
- In the pop-up window, enter your username and password for the Namespace Register environment that we created on Trailhead to register our Namespace, and click Log In.
- In the permissions window for Salesforce DX Namespace Registry, click the Allow button.
- In the Namespace Registries page, click the down arrow next to the View List in the Recently Viewed section and select the List View All Namespace Registries.
- Our new namespace will appear in the list with the fields Number, Namespace Prefix, Created Date, and Created By.
- Excellent! We've linked our namespace to our Dev Hub environment. Now, we can define the tns1 namespace for packages we create and register under this Dev Hub.
Creating a New Project in Salesforce DX with a Package, Version, and Namespace
To create a new project in Salesforce DX, we'll clone an existing project from Bitbucket, a remote repository service similar to GitHub. Follow these steps:
- Open Visual Studio Code.
- Press Ctrl + Shift + P to open the command palette.
- Type Clone in the command palette and press Git: Clone, or alternatively, open the Explorer from the left sidebar (Ctrl + Shift + E) and click the Clone Repository button.
- Paste the following command into the command palette:
git clone https://LiorLavi@bitbucket.org/LiorLavi/samplehelloworldlwc.git - Choose the destination directory where the repository will be copied.
- Click on Select Repository Location.
- If Visual Studio Code displays a message on the right-hand side that reads Would you like to open the cloned repository?, click Open.
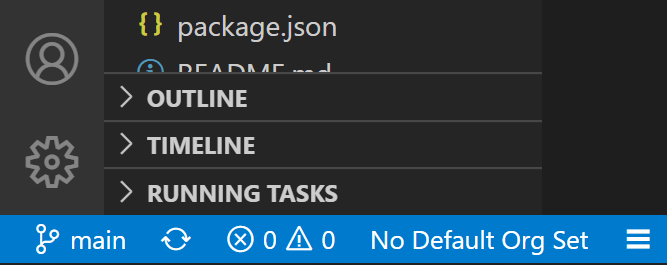
- Wait for the Salesforce DX Extensions to load and then click the No Default Org Set tab to configure a connection to our Dev Hub environment.
- Click on the command SFDX: Authorize an Org.
- Select Production.
- Enter a name, alias, for example, Namespace DevHub, and press Enter.
- In the browser window that opens, enter your username and password for the Namespace DevHub environment we created on Trailhead, and click Log In.
- In the Allow Access window, click the Allow button.
- Go back to Visual Studio Code and make sure that the alias for the environment you selected is displayed in place of No Default Org Set.
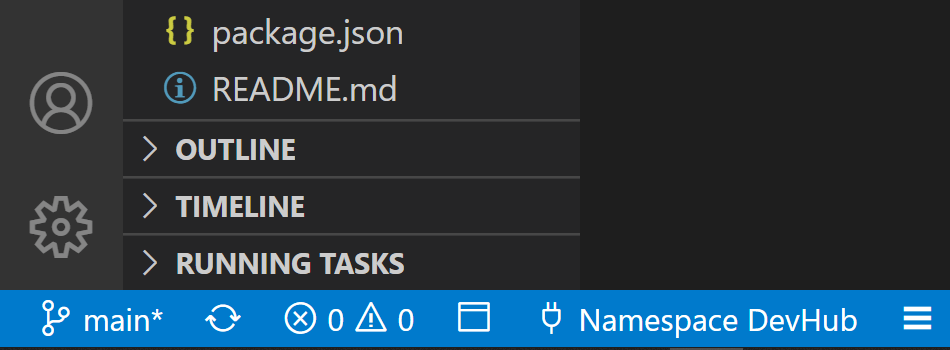
- Click on the alias for the Namespace DevHub environment.
- In the command palette, click on SFDX: Authorize a Dev Hub.
- In the browser window that opens, enter your username and password for the Namespace DevHub environment we created on Trailhead, and click Log In.
- If your terminal is not open, press the shortcut Ctrl + ~ to open it.
- To verify that Namespace DevHub is indeed set as our default Dev Hub environment in the project, run the following command in the terminal:
The output of the command should look something like this:sfdx force:config:get defaultdevhubusername=== Get Config Name Value Success ───────────────────── ────────────────── ─────── defaultdevhubusername Namespace DevHub true
- Now, let's create a new package and version with a namespace. Open the sfdx-project.json file located in the root directory of our project, next to the files README.md and package.json.
- Change the value in the namespace field from "" to the namespace you created. In our example, it's the value tns1. The sfdx-project.json file should look roughly like this:
{ "packageDirectories": [ { "path": "force-app", "default": true } ], "name": "SampleHelloWorldLWC", "namespace": "tns1", "sfdcLoginUrl": "https://login.salesforce.com", "sourceApiVersion": "55.0" } - Save the changes you made to the file.
- Now, we can create our package. Run the following command to create a new package with a namespace:
sfdx force:package:create -n MyFirstPackWithNamespace -t Unlocked -r force-app -d "My awesome first package with namespace!" - Run the following command to see the list of packages linked to our Dev Hub. Only one record should appear in the list, and the value in the Namespace Prefix field should be the namespace we created.
The command output should look something like this:sfdx force:package:list=== Packages [1] Namespace Prefix Name Id Alias Description Type ──────────────── ──────────────────────── ────────────────── ──────────────────────── ──────────────────────────────────────── ──────── tns1 MyFirstPackWithNamespace 0Ho*** MyFirstPackWithNamespace My awesome first package with namespace! Unlocked
- Run the following command to create a new version for the package:
sfdx force:package:version:create -p MyFirstPackWithNamespace -d force-app -k test1234 --wait 10 - Run the following command to see the list of versions on our Dev Hub. Only one version should appear. Note the Namespace field, it should contain the namespace we created.
The command output should look something like this:sfdx force:package:version:list=== Package Versions [1] Package Name Namespace Version Name Version Subscriber Package Version Id Alias Installation Key Released Validation Skipped Ancestor Ancestor Version Branch ──────────────────────── ───────── ──────────── ─────── ───────────────────────────── ──────────────────────────────── ──────────────── ──────── ────────────────── ──────── ──────────────── ────── MyFirstPackWithNamespace tns1 ver 0.1 0.1.0.1 04t*** MyFirstPackWithNamespace@0.1.0-1 true false false N/A N/A
- Now, all that's left is to create a scratch org, install our latest version on it, and verify that the namespace is indeed associated with our package in the environment. To create a new scratch org, type the following command in the terminal:
sfdx force:org:create -s -f config/project-scratch-def.json - To open the scratch org we created in a browser, type the following command:
sfdx force:org:open - In the browser window that opens for our scratch org, go to Setup and search for the word Package in the Quick Find.
- From the results, select Installed Packages to see the list of installed packages in the environment. The Installed Packages list should be empty at this stage.
- Go back to Visual Studio Code and run the following command in the terminal to install our version in the scratch org:
sfdx force:package:install --wait 10 --publishwait 10 --package MyFirstPackWithNamespace@0.1.0-1 -k test1234 --noprompt - Now, all that's left is to check that the installed version does indeed have our new namespace. Open the scratch org and go to Installed Packages from the Quick Find in Setup.
- Make sure that our new package is installed, and that the Namespace Prefix is configured with the namespace we created.

That's it! We've created a namespace, linked it to our Dev Hub, created a package and version that use it, and installed them for testing in a scratch org!

If you’re test-driving unlocked packages, use a test namespace.
Use real namespaces only when you’re ready to embark on a development path headed for release in a production org.